

While technical information and fear mongering are both plentiful on the Internet, no one has bothered to create a “state of the world” when it comes to 3D printing firearms.
There isn’t a single source that will quickly say what is currently possible, how we got here, and what can we do about it. This article seeks to correct that deficiency.
I want to Tarantino this and get you the answer most people are looking for first before delving into the details: 3D printed versions of the Glock 19, the AR-15, and the AK-47 all exist, are known to survive 1000+ rounds, and can be printed by anyone with a $224 printer. The current generation of the AR-15 is actually considered superior to any polymer ARs on the market.
For our European friends there is also the FGC-9, a 9mm carbine that uses no European regulated parts. That’s right, you make your own barrel with this one. Guides also exist to make your own 9mm ammunition. One of the major figures in the 3D gunsmithing world is based in Europe, and he designed the FGC-9 and the ammunition guide to work around the regulations in his home country.
The remainder of this article will be separated into sections to allow the reader to jump around as needed. Next up I want to cover the current US Regulatory environment that 3D prints exist to circumvent. After that I will give a tour of several popular models and the equipment needed to build them. Lastly, I will give my personal experience in 3D printing both generally, and firearms specifically.
Laws in the United States
The Gun Control Act of 1968 is really what set the stage for our current regulatory environment. It was passed as a reaction to the assassinations of Rev. Dr. Martin Luther King Jr on April 4, 1968 and President John F. Kennedy on June 5th of the same year. The GCA prohibited engaging in the business of selling or manufacturing firearms without a license, commonly today known as an FFL. Prior to 1968, there were no restrictions on selling firearms or who could do it at the Federal level.
In order to properly enforce this law the ATF needed to determine what is a firearm, specifically which part of a firearm is the regulated part. This makes a lot of sense when you look at basically any other regulated industry. Is a tire a car such that you need a car dealership to sell them? The piece that they came up with is the receiver:
“That part of a firearm which provides housing for the hammer, bolt or breechblock, and firing mechanism, and which is usually threaded at its forward portion to receive the barrel. 27 CFR § 478.11..“

This means that anyone can engage in selling other gun parts, such as barrels, trigger guards, etc. It also means that if you were to buy all the other parts for a gun, but make the receiver you would have manufactured a gun for personal use, which is legal under Federal laws.
The original GCA did not include provisions for background checks. Yes, you had to buy your guns from a licensed dealer, but that dealer could and would sell to anyone. Background checks would not come until the Brady Handgun Violence Prevention Act in 1993. The addition of a background check requirement lead to the invention of the 80% Lower, a piece of metal that was machined 80% of the way to being a receiver, but was not quite finished. These could be sold by anyone, to anyone, without a background check.
They are still quite popular, with companies like polymer80 selling 80% receivers for the AR-15, most Glocks, and the 1911.
One of the ideas behind the popularity of the 80% lower was as a way around potential gun control, such as a new version of the Federal Assault Weapons Ban of 1994 which sunset in 2004. Under that bill, banned weapons that were owned before the Act were still legal, and parts manufacturers could sell replacement parts for them. So, if a person wanted to get around the act, they could order all the parts, an 80% lower and then claim that it was a pre-ban firearm.
Each 80% lower on the market has been evaluated by the ATF and the manufacturer has a letter from them stating that the product is not a firearm, and not regulated. However, that is just an ATF ruling not a law, and the ATF is notoriously capricious. There is nothing stopping them from tomorrow ruling that 80% receivers are in fact firearms, and some other standard of machining is the new “not really a gun.” OK, there is a process for a rule change, but again these are ATF rules and not subject to a congressional vote.
So as a further layer of protection, and as a way of circumventing certain state laws, the gun community has always been interested in a way of manufacturing the regulated parts of firearms at home.
Enter the 3D printer.
3D Printing a Gun
For the reasons stated above, when most people talk about 3D-printed guns they generally mean 3D printing the receiver, the only piece of a gun you need to go to a dealer and submit to a background check in order to obtain, then finishing the rest of the gun with store bought parts. The exception to this is FGC-9, which is what we will be spending the majority of our time talking about.
The printer that most people who do this use is the Creality Ender 3, which currently retails for $223.99 on amazon. I personally use the slightly more expensive Creality CR-10, because I wanted a larger print space for other, non-gun projects. The Ender 3 is pretty much a plug and play appliance, if you can use a microwave you can use this, and there are thousands of guides on YouTube showing you how to get your printer running nicely.
Printers work by melting plastic filament, then laying down layers of it to build up an object. The filament most popular for guns is eSun’s PLA+. Other brands of PLA+ work as well, but there isn’t really a price break if you use something else. A 1kg roll of PLA+ will run you about $23 at the time of writing. To put that in perspective, my last Glock 19 print used 135g or $3.10 of material, the AR-15 took 265g or $6.09.
These aren’t toys either. Lots of people in the community have hit 10,000 rounds with printed lowers. That AR-15 is also capable of doing “rifle pushups,” which market polymer 80s are not. Gone are the days of the single shot liberator, fully fledged 3D-printed guns are here.
When this comes up in conversation, a lot of people will then jump to regulating the harder-to-print pieces, namely the barrel and ammunition. That was the challenge that lead to the development of the FGC-9: can you build a functional, workable firearm in some of the toughest regulatory environments such as Europe, Australia, and China?
The barrel was solved via a method called “electro-chemical machining” or ECM, in which the barrel is hooked up to an electrical source while salt water runs through it. The result is a rifled barrel capable of similar ballistics as standard Glocks. This barrel is then epoxied to two metal bands that keep it in place.
The recoil runs through an oversized upper receiver, into a standard AR buffer tube. The firing pin and buffer are cut out of standard bar stock, and stick welded together.
The gun feeds from standard Glock magazines, and uses an airsoft fire control group.
Building the FGC-9 is far more involved than building a printed Glock or AR, but not nearly as complicated as building an AK-47. Examples have been built in several European countries, Australia, and mainland China.
9mm ammunition comes from reactivating spent shells, much like US based reloaders do. Apparently, the cases themselves are not regulated anywhere, and are sold as collectors items in many countries. Powder and primers are obtained from nail gun charges, and all the presses and jigs needed to assemble live rounds are 3D printed.
The FGC-9 takes two full kilograms of material to print, and takes a week of print time. Stock for the barrel, firing pin, and buffer will run around $100, assuming you don’t do a group buy. The additional tooling you will need for ECM is about another $100, but this should be viewed as a capital expense, as you can use it over and over to crank out more barrels.
The bottom line is, regardless of the regulatory environment, a working 9mm semi-automatic carbine can be had by anyone with $500 and 3 weeks of part time work.
Printing My Gun
It was my dream for years to design and distribute a 3D-printable version of the Remington Model 1858 revolver. I figured that since black powder and percussion caps are both easily manufactured at home using unregulated materials, this was the natural “basic gun” that could be built in highly regulated environments, to be used both for self defense and in the opening salvo of a popular uprising. Imagine my surprise when I saw the FGC-9. I still might do my 1858 some day, just for fun.
The print process all starts with an .stl file, this is a 3D representation of the object to be printed. You can find lots of objects like this on thingiverse, but the largest repository for 3d firearm models is Defense Distributed. The fan group “Deterrence Dispensed” has a much more curated collection of printable projects, usually along with very detailed instructions on how to build and use the items. To get in contact with them, join team “det_disp” on keybase. The how to on that is out of scope here, but Google is your friend.
That .stl file is then loaded into a program called a “slicer” which does exactly what it says, it slices the object into each layer that the printer will lay down, and writes the machine code that the printer reads. The most popular slicer is called Cura, and it is free. Once cura has created the code needed, it goes to the printer.
As I said before, I have a Creality CR-10 as I wanted the larger print bed. The first gun I printed was the FGC-9, but I have yet to complete it for various personal reasons. The print took a week, during which I learned a lot about how to use my printer. If I had this time to do over again, I would spend more time printing toys and what not to get the printer tuned in.

I also printed several magazines both for the Glock 17 and extended models, all of which performed admirably.
My next print project was the Glock 19. The first print to come out was pretty rough, owing to the settings I had used. The magazine well was badly undersized, and much filing and sanding could not correct this. For the Mark II, I changed a couple settings, namely the type of supports.

As I said before, printers lay down layers of plastic to build up the print. Thus, when something overhangs the base, or even overhangs whatever is directly below it, we generally need support material in place during the print, which is removed once the print is completed. Standard supports are just lines and blocks of material, but Cura also has a support pattern called “trees” which generates tree-like structures to support overhangs. They look really funky, but use a lot less material and remove much more easily.

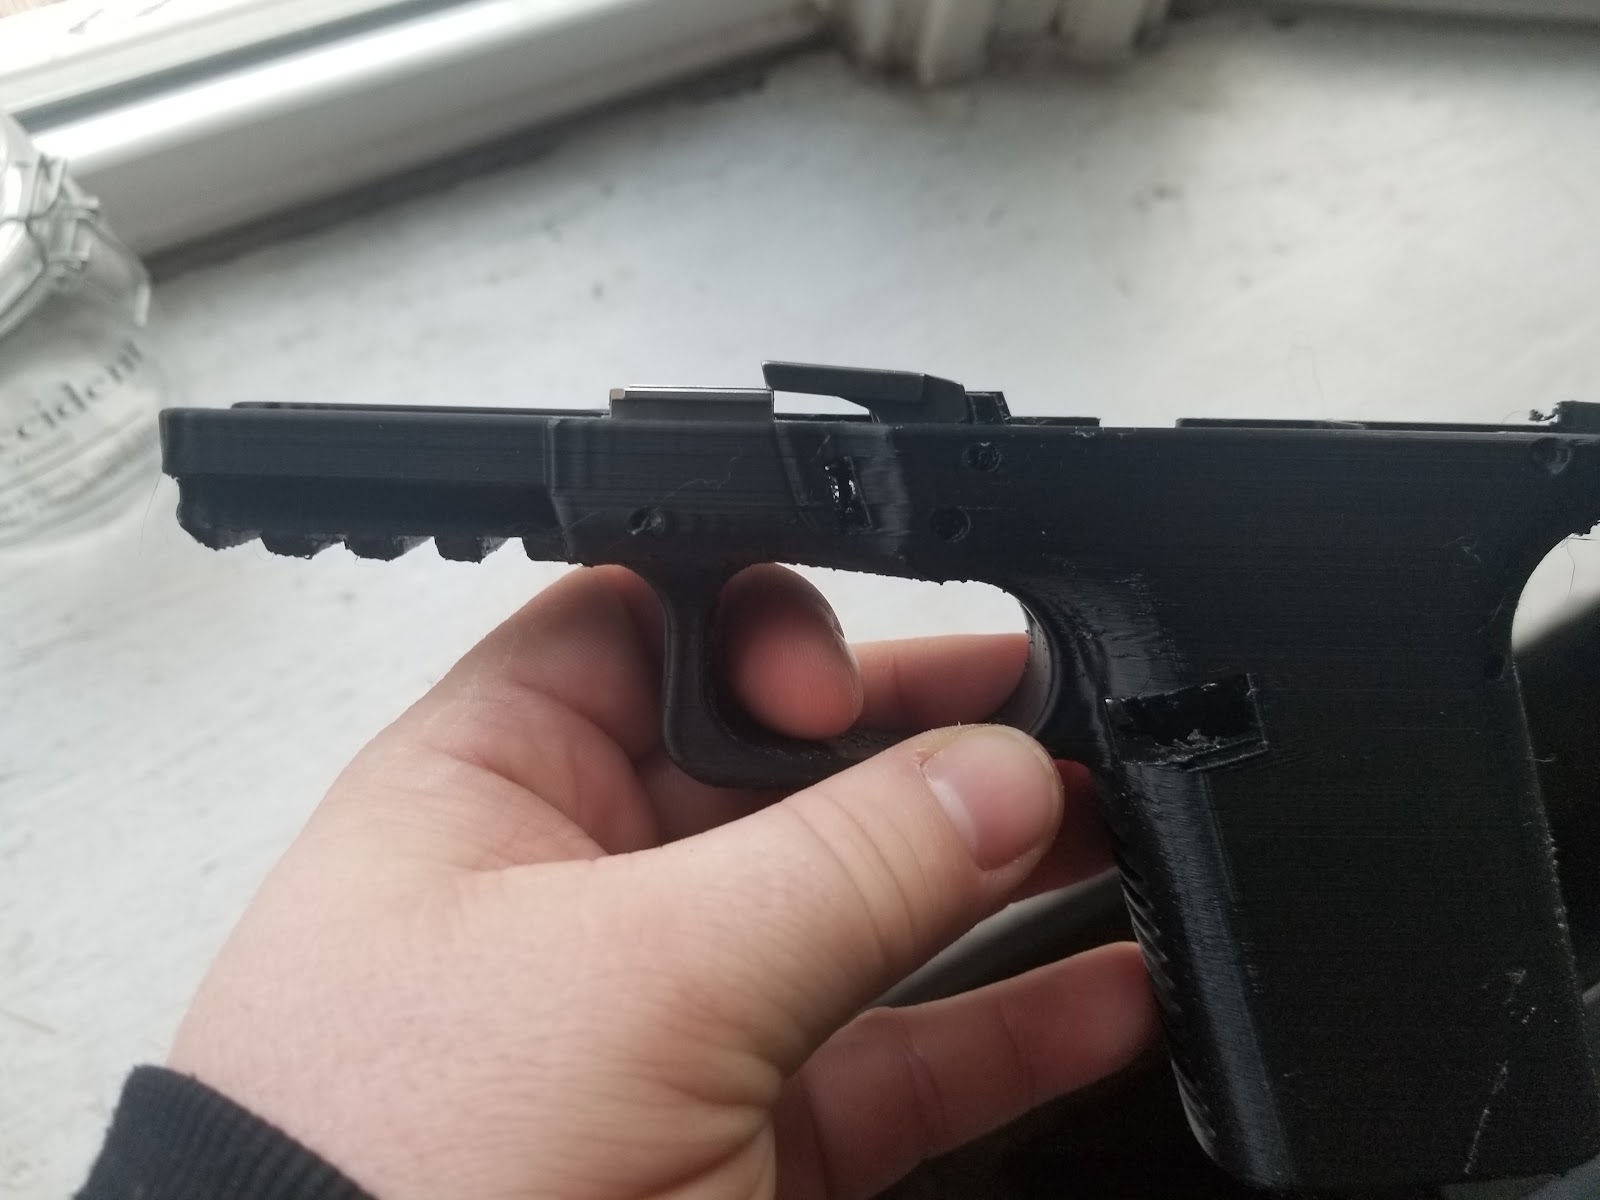
The magazine well issue was pretty well solved at this point, and so I moved on to assembling the rest of the receiver. 3D-printed Glocks require a machined metal slide block which the gun’s slide runs on at both the front and the back of the gun. The front rail block sits directly in front of the locking block, and this was my next issue. No matter how much I filed and chiseled, the locking block still overlapped the locking block by about 3mm.
Around this time I also noticed that the holes for the various pins that go through the gun were not perfectly round. I attributed this, and the missized locking block to rail section to warping. PLA+ prints at a very high temperature, 220°C and until it cools and hardens it can be manipulated. I was printing the frame upside down, with the magazine port facing directly up, and figured that the weight of the print was squishing those holes lopsided before they had a chance to harden.
For the Mark III print, I flipped the gun so it printed right side up. This worked beautifully, the holes were perfectly round, the magazine slipped in and out nicely, and the locking block slid right into place. 3mm overhanging the rail. As I tried to cram the two in place, I accidentally damaged the frame beyond what I felt was safe to continue.

On the Mark IV, I made some minor adjustments mostly around printing temperature, but nothing drastic. This one came out even better than the previous, but still had that overlap. At this point I got on keybase to ask about the problem, and the rail block manufacturer pointed out that I had purchased the wrong locking block! He quickly explained how to modify the locking block, and now the gun functions wonderfully.
In the future, I plan on printing and assembling a second complete lower. Once I see any sign of fatigue or failure on the current gun, I can simply pull the slide off it, put it on the new one, and we are back in business. Then I can take my time printing a new frame, and moving the lower parts to it from the discarded one.
Conclusion
3D-printed guns are here, and it seems no regulatory environment can stop them. Regardless of how you feel about it, that is the reality we all need to accept if we are to move forward with any kind of intelligent discussion of firearms. In the race between technology and legislation, technology always wins and this is no exception.
I think guns should be less regulated than soda pop, and thus see this as a huge win for freedom. To those who disagree, I invite you to look at other options. Prohibition flat does not work. The prohibition of alcohol led to modern organized crime just as the prohibition of drugs has lead to cartels, street gangs, and modern cops wearing bullet proof vests. What will prohibition of firearms lead to? Nothing good.
We should look at the sources of violence, rather than the currently most popular tools. The previously mentioned prohibition of drugs, in my opinion, leads to violence. Ending just the prohibitions on marijuana at the federal level would go a long way to ending the smuggling and accompanying violence we currently see.
Additionally, we should look towards proven intervention methods such as Operation Ceasefire, which successfully decreased Boston’s youth homicide rate by 63%, and Stockton’s overall firearm homicide rate by 42% by using data science to identify and actively work with individuals with the highest potential for violence.
To borrow a phrase from another debate, if you are really concerned with preventing gun violence, you would be working on these items rather than focusing on banning guns.
– Michael Corey

One thought on “The Current State of 3D Printing Guns”
You must log in to post a comment.